I realized an FAQ might be beneficial, so here goes:

Monday, June 10, 2013
Corset-a-Long: Historical Examples
| http://collections.lacma.org/node/214134 |
 |
| http://www.vam.ac.uk/content/articles/c/crinolines-crinolettes-bustles-corsets-1860-1880/ |
 |
| http://www.philamuseum.org/collections/permanent/153082.html?mulR=10512|4 |
We're not going to talk as much about these kind of corsets:
| Pre-1850 |
| Corded Pre-1850 |
So where do you start your search for a historically accurate corset? I like to start at museums. There are many collections out there that are searchable and yield some excellent results:
Philadelphia Museum of Art
Museum of Fine Arts: Boston
Metropolitan Museum of Art
LACMA
Augusta Auctions
Tasha Tudor Auction
Antique Corset Gallery
You can use these databases to pinpoint the finer examples of your chosen time period, but here's a brief overview. Keep in mind we're working with generalizations, and you'll always be safer researching your own examples of the corset you'd like to make.
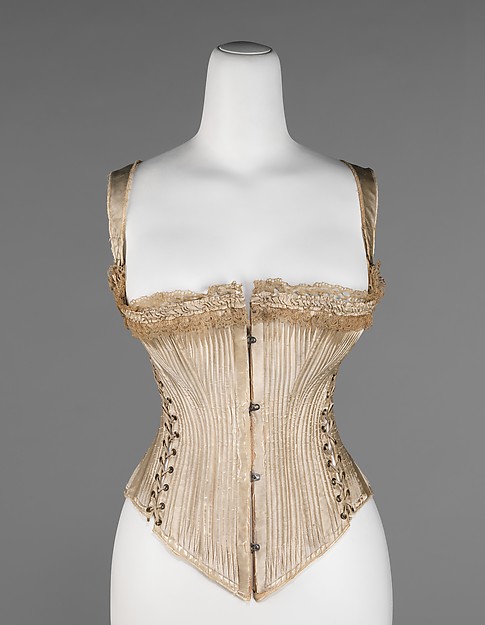
In the 1850's and 60's the emphasis in fashion was on a narrow waist accentuated by a belled skirt. The main goal of corseting was to support the bust and slim the waistline while also providing a firm foundation to hang all those skirts off of. Corsets were short and generally came up to mid-bust, which was tall enough to support the bust but not long enough to be modest without the accompanying chemise. The corsets generally laced in back and closed in the front with a separating busk:
 |
| http://www.augusta-auction.com/list-of-upcoming-sales?view=lot&id=12871&auction_file_id=27 |
| http://blog.fidmmuseum.org/museum/2012/11/blue-corset-c-1868-1874.html |
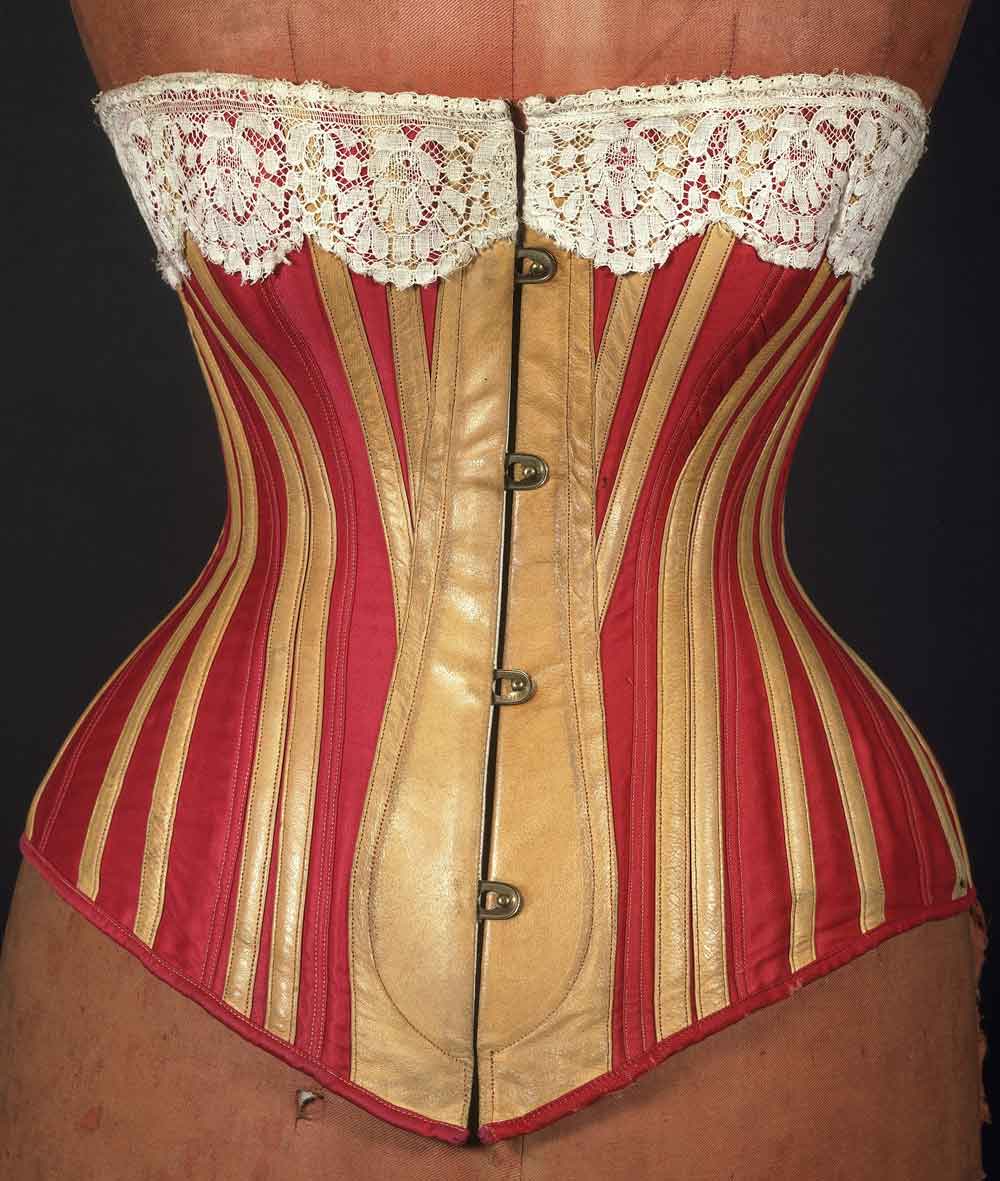
In the late 1860's and continuing into the 1870's skirts started to narrow, putting more of an emphasis on the hip and stomach area. Corsets got longer at the bottom to give these areas more control:
 |
| http://www.augusta-auction.com/component/auctions/?view=lot&id=4788&auction_file_id=8 |
 |
| http://metmuseum.org/Collections/search-the-collections/80096294 |
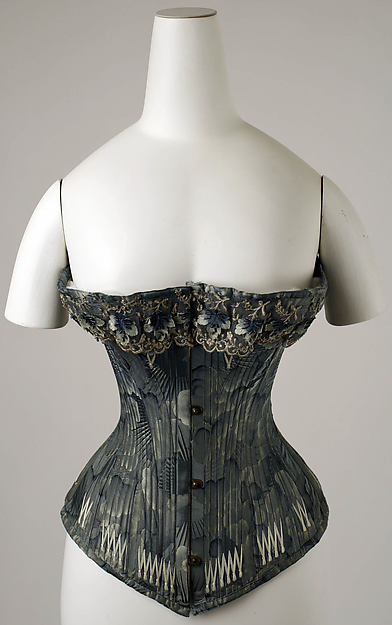
In 1879 the Spoon Busk was invented. This busk, which is larger at the bottom, provides support to a lower stomach pouch that is created when the waist is constricted more for reduction and less for compression. As corsets in the late 1870's and 1880's were drawn tighter there became a greater emphasis on the waist and the longer corsets became more curvy as they sought to control the displaced flesh. Many corsets took on a characteristic lower stomach curve, which was considered quite fashionable:
 |
| http://www.vam.ac.uk/content/articles/c/corsets-and-bustles-1880-1890-from-over-structured-opulence-to-the-healthy-corset/ |
 |
| http://metmuseum.org/Collections/search-the-collections/80008003 |
These fashions continued through the 1890's, with an increasing emphasis on a small waist, with the only variation being that some corsets got a little longer on top to cover and control more of the bust:
 |
| http://www.philamuseum.org/collections/permanent/244011.html?mulR=6243|5 |
 |
| http://www.augusta-auction.com/component/auctions/?view=lot&id=181&auction_file_id=1 |
Starting in 1900 the "healthy corset" movement introduced a new straight-front corset that had more extreme seaming and stiffer boning in front to give less restriction to the rib cage. However, women quickly discovered that this new corset style could be laced much tighter than the old ones, and quickly adopted it to dangerous degrees. These corsets are constructed much like the corsets of the 1850-1900s, but require much more care in fitting and styling, so they're not really appropriate for a first corset.

As you can see there are many variations of color and color combinations possible. Are there any styles that stick out to you already? What time period are you aiming for?
Corset-a-Long Schedule
Lots of people expressed interest in this, so it's a go! Here's a schedule of posts so you can plan out your project:
FAQ
June 10 - Historical Examples
June 12 - Patterns
June 14 - Measurements
June 16 - Material Suppliers
June 17 - Materials: Fabrics
June 18 - Materials: Boning
June 19 - Materials: Busks
June 20 - Materials: Grommets
June 21 - Materials: Tapes and Others
June 24 - Tools
June 25 - Lacing Strips Tutorial
June 27 - The Mock Up
June 28 - Fitting
July 5 - Cutting your Fabric
July 12 - Sewing and Bone Tape
July 19 - Inserting the Busk
July 26 - Grommeting
August 2 - Boning
August 9 - Binding and Finishing
Friday, June 7, 2013
Starting a New Research Project
I've started working on a 15th century costume project for CC32. I thought it might be useful for people to see how I start up a costume research project. I know that I find starting the research to be the most intimidating part of the research. Information seems to build on itself, but getting that first part can be really hard. Here are the four places I go to when I'm working out a research project:
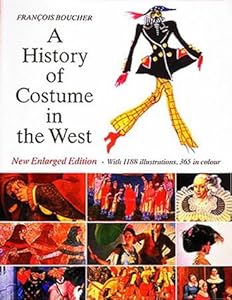
This book is my favorite place to start researching historical costume. It has a great overview of western fashion split up by time and then further detailed by location. Each time has a ton of pictures to look at and a bibliography to get further information. Unfortunately for this particular project the time period in question concentrates on France with info for Italy and Spain, but its English information is one paragraph that pretty much says "they wore stuff a lot like the Germans".

I know, I know, a lot of you probably think this one is crazy or discredits me immediately. However, like a paper Encyclopedia I think Wikipedia is a great place to START research (the trouble comes in when it's an end, not a beginning). The key to Wikipedia is mining the pictures and the endnotes. For this project the page shows a lot of the same style of pictures as Boucher. At this point I'm definitely starting to realize that portraits are not the way to go, but that illustrations seem to show a lot of what I'm looking for. There are some great leads to books in the endnotes, too (Cosman, Madeleine Pelner; Anne Hollander; and M. Vibbert for anyone looking for the info).

Another great place to mine sources for original art, Pinterest can also be hit or miss. I start by plugging in basic search terms (15th century, medieval costume, gothic art, etc) and pin the results to my own research board. After that you start following the links. Some will lead to crappy places like Tumblr that won't give you any information at all, but you'll likely end up with at least a few that lead to art museums, blog posts by knowledgeable enthusiasts, or other great sources.
 A final place I like to start looking for information is in a good network of costumers. You never know who knows about what you 're looking for, or who knows someone who does. Ask around on facebook, livejournal, or on your blog, wherever your connections to costumers are. The key to this is to ask for leads to primary sources, not for a dissertation on everything you need to know. People are usually happy to provide a lead or two, but or to answer a few specific questions, but something open-ended like "tell me what I need to know to make a 15th century costume" is likely to lead to silence because the answer is just too big. Ask for help, not for the complete picture. In my case this is really where my new project broke, a friend told me to look up books by a manuscript researcher named Janet Backhouse.
The important thing to remember when you're starting out your research is that you're probably not going to have all the information handed to you on a silver platter. Look for places to start, not to end, and you might find that the trail of information leads you on a great journey.
This book is my favorite place to start researching historical costume. It has a great overview of western fashion split up by time and then further detailed by location. Each time has a ton of pictures to look at and a bibliography to get further information. Unfortunately for this particular project the time period in question concentrates on France with info for Italy and Spain, but its English information is one paragraph that pretty much says "they wore stuff a lot like the Germans".
I know, I know, a lot of you probably think this one is crazy or discredits me immediately. However, like a paper Encyclopedia I think Wikipedia is a great place to START research (the trouble comes in when it's an end, not a beginning). The key to Wikipedia is mining the pictures and the endnotes. For this project the page shows a lot of the same style of pictures as Boucher. At this point I'm definitely starting to realize that portraits are not the way to go, but that illustrations seem to show a lot of what I'm looking for. There are some great leads to books in the endnotes, too (Cosman, Madeleine Pelner; Anne Hollander; and M. Vibbert for anyone looking for the info).
Another great place to mine sources for original art, Pinterest can also be hit or miss. I start by plugging in basic search terms (15th century, medieval costume, gothic art, etc) and pin the results to my own research board. After that you start following the links. Some will lead to crappy places like Tumblr that won't give you any information at all, but you'll likely end up with at least a few that lead to art museums, blog posts by knowledgeable enthusiasts, or other great sources.
The important thing to remember when you're starting out your research is that you're probably not going to have all the information handed to you on a silver platter. Look for places to start, not to end, and you might find that the trail of information leads you on a great journey.
Monday, May 6, 2013
Monday Progress Update: May 6
Uh oh! It's moving day and I still have costumes to complete . . . wonder if I can work while they're packing.
I feel like I haven't accomplished much since last week, it's been slow going.
I didn't have enough crochet thread left over for the side panel mirrors, so I dyed more:

Then I started sewing with it, and, of course, I grabbed a ball of yarn and not crochet thread. Yarn shreds on the sharp mirror edges, so I had to go correct my error. Didn't get a picture of it, but I got it all figured out, and I ended up with three great shades that are a pretty close match to the brocade.
Next I worked on the top. I cut the pattern, then tried it on to make the V. The inset is a celery-green lace which will match the tiny bottom layer of the hangy bits. I got the applique on it, and the mirror is glued down waiting for couching. I cut the sleeves with a bit of a bell to them, and traced them on paper and diagrammed out the appliques. The appliques got cut out and ironed to themselves last night (there are a few layers to this one), and I'll iron them on the sleeves as soon as I figure out the shape. I tried on the shirt and it really needed a dart, so I made a bust dart . . . and I've got to see how that affects the sleeve set before I do something permanent like applique.
In the meantime I did get a little bit of Aang done, and I got pictures of Thing 2 in his outfits (he's adorable, I can't wait to see them in person!). Mostly, though, I cleaned and organized my room for tomorrow. I'm looking forward to my new house, the sewing room will be so organized I'll work really quick!
Subscribe to:
Posts (Atom)